python使用自定義釘釘機(jī)器人的示例代碼
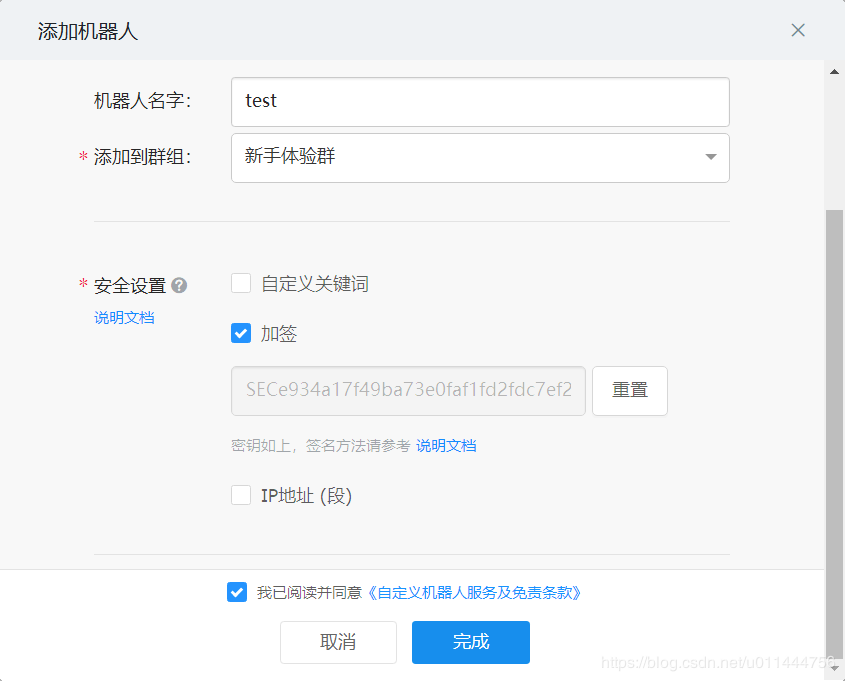
1.添加自定義機(jī)器人
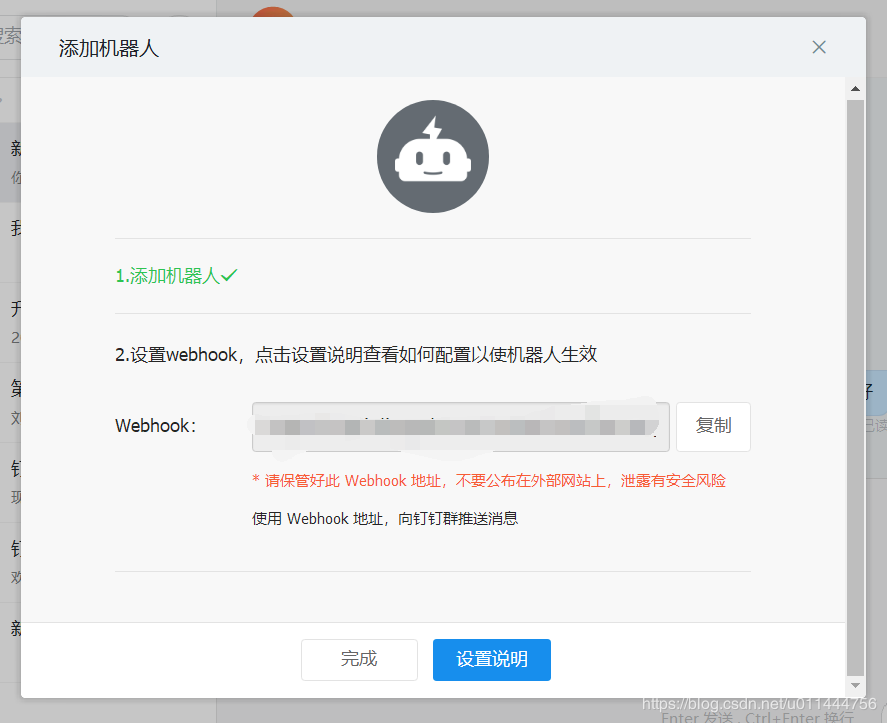
2.編寫python代碼請(qǐng)求釘釘機(jī)器人所給的webhook
釘釘自定義機(jī)器人官方文檔
安全方式使用加簽的方式:
第一步,把timestamp+'n'+密鑰當(dāng)做簽名字符串,使用HmacSHA256算法計(jì)算簽名,然后進(jìn)行Base64 encode,最后再把簽名參數(shù)再進(jìn)行urlEncode,得到最終的簽名(需要使用UTF-8字符集)。
參數(shù)
說(shuō)明
timestamp
當(dāng)前時(shí)間戳,單位是毫秒,與請(qǐng)求調(diào)用時(shí)間誤差不能超過(guò)1小時(shí)
secret
密鑰,機(jī)器人安全設(shè)置頁(yè)面,加簽一欄下面顯示的SEC開頭的字符串
import requests #python 3.8import timeimport hmacimport hashlibimport base64import urllib.parse timestamp = str(round(time.time() * 1000))secret = ’加簽時(shí)生成的密鑰’secret_enc = secret.encode(’utf-8’)string_to_sign = ’{}n{}’.format(timestamp, secret)string_to_sign_enc = string_to_sign.encode(’utf-8’)hmac_code = hmac.new(secret_enc, string_to_sign_enc, digestmod=hashlib.sha256).digest()sign = urllib.parse.quote_plus(base64.b64encode(hmac_code))print(timestamp)print(sign)
第二步,把 timestamp和第一步得到的簽名值拼接到URL中。
參數(shù)
說(shuō)明
timestamp
第一步使用到的時(shí)間戳
sign
第一步得到的簽名值
https://oapi.dingtalk.com/robot/send?access_token=XXXXXX×tamp=XXX&sign=XXX
第三步,發(fā)送請(qǐng)求
url=’生成的Webhook×tamp={}&sign={}’.format(timestamp, sign) print (url)headers={ ’Content-Type’:’application/json’}json={'msgtype': 'text', 'text': { 'content': '888' } }resp=requests.post(url=url,headers=headers,json=json)print (resp.text)
結(jié)果:

整體代碼:
import requests #python 3.8import timeimport hmacimport hashlibimport base64import urllib.parse timestamp = str(round(time.time() * 1000))secret = ’加簽時(shí)生成的密鑰’secret_enc = secret.encode(’utf-8’)string_to_sign = ’{}n{}’.format(timestamp, secret)string_to_sign_enc = string_to_sign.encode(’utf-8’)hmac_code = hmac.new(secret_enc, string_to_sign_enc, digestmod=hashlib.sha256).digest()sign = urllib.parse.quote_plus(base64.b64encode(hmac_code))print(timestamp)print(sign) url=’生成的Webhook×tamp={}&sign={}’.format(timestamp, sign) print (url)headers={ ’Content-Type’:’application/json’}json={'msgtype': 'text', 'text': { 'content': '測(cè)試' } }resp=requests.post(url=url,headers=headers,json=json)print (resp.text)
到此這篇關(guān)于python使用自定義釘釘機(jī)器人的示例代碼的文章就介紹到這了,更多相關(guān)python 自定義釘釘機(jī)器人內(nèi)容請(qǐng)搜索好吧啦網(wǎng)以前的文章或繼續(xù)瀏覽下面的相關(guān)文章希望大家以后多多支持好吧啦網(wǎng)!
相關(guān)文章:
1. 用xslt+css讓RSS顯示的跟網(wǎng)頁(yè)一樣漂亮2. ASP.NET Core自定義中間件的方式詳解3. 《CSS3實(shí)戰(zhàn)》筆記--漸變?cè)O(shè)計(jì)(一)4. HTML5 Canvas繪制圖形從入門到精通5. 讓chatgpt將html中的圖片轉(zhuǎn)為base64方法示例6. 詳解JSP 內(nèi)置對(duì)象request常見用法7. html5手機(jī)觸屏touch事件介紹8. CSS3實(shí)現(xiàn)動(dòng)態(tài)翻牌效果 仿百度貼吧3D翻牌一次動(dòng)畫特效9. 測(cè)試模式 - XSL教程 - 510. JSP的Cookie在登錄中的使用
 網(wǎng)公網(wǎng)安備