Android中ImageView的使用方法
Android中ImageView的使用:點擊按鈕,改變圖片透明度,切換圖片
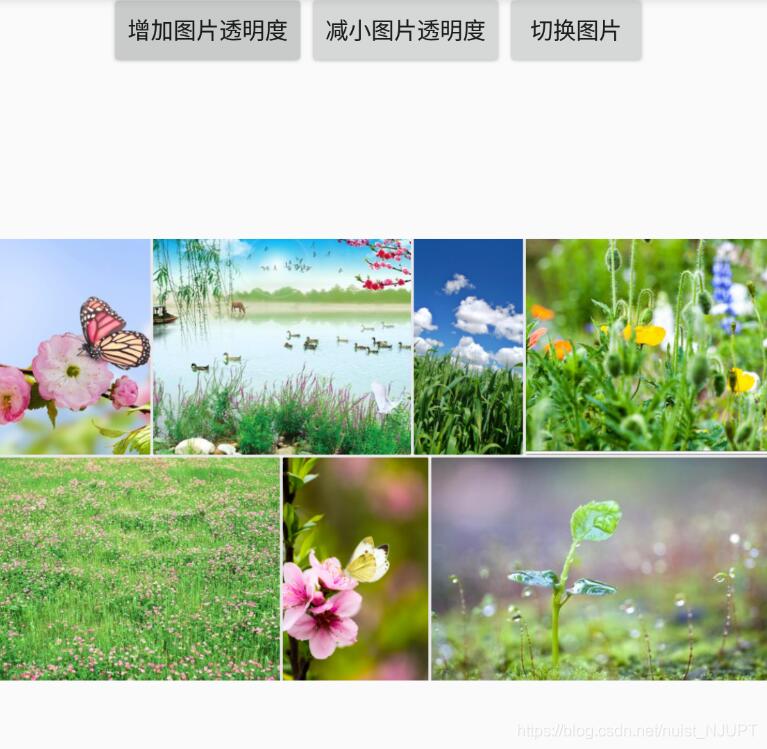
布局是三個按鈕組件和一個ImageView組件
<?xml version='1.0' encoding='utf-8'?><LinearLayout xmlns:android='http://schemas.android.com/apk/res/android' android:orientation='vertical' android:layout_width='match_parent' android:layout_height='match_parent'><LinearLayout android:layout_width='match_parent' android:layout_height='wrap_content' android:orientation='horizontal' android:gravity='center'> <Buttonandroid: android:layout_height='wrap_content'android:layout_width='wrap_content'android:text='增加圖片透明度'/> <Buttonandroid: android:layout_width='wrap_content'android:layout_height='wrap_content'android:text='減小圖片透明度'/> <Buttonandroid: android:layout_width='wrap_content'android:layout_height='wrap_content'android:text='切換圖片'/></LinearLayout> <ImageViewandroid: android:layout_width='wrap_content'android:layout_height='280dp'android:layout_marginTop='100dp'android:scaleType='fitCenter'android:src='http://www.aoyou183.cn/bcjs/@drawable/spring'/></LinearLayout>
.java文件,控制增加和減少透明度以及圖片切換
public class MainActivity extends AppCompatActivity { private Button addAlpha; private Button downAlpha; private Button next; private ImageView imageView1; int [] images = new int[]{ //用數組存儲春,夏,秋,冬四張圖片 R.drawable.spring, R.drawable.summer, R.drawable.fall, R.drawable.winter } ; int currentImage = 0 ; //定義當前默認顯示的圖片 int alpha = 255 ;//定義圖片起始透明度 @Override protected void onCreate(Bundle savedInstanceState) {super.onCreate(savedInstanceState);setContentView(R.layout.activity_imageview);addAlpha = (Button) findViewById(R.id.addAlpha);downAlpha = (Button) findViewById(R.id.downAlpha);next = (Button) findViewById(R.id.next);imageView1 = (ImageView) findViewById(R.id.imageView1);//對增加圖片透明度按鈕設置監聽事件addAlpha.setOnClickListener(new View.OnClickListener() { @TargetApi(Build.VERSION_CODES.JELLY_BEAN) @Override public void onClick(View v) {if(alpha >= 255){ //255是透明度上線 alpha = 255 ;}else{ //每點擊增加透明度按鈕,透明度增加20 alpha += 20 ;}imageView1.setImageAlpha(alpha); //為圖片設置透明度 }});//對減少透明度按鈕設置監聽事件downAlpha.setOnClickListener(new View.OnClickListener() { @TargetApi(Build.VERSION_CODES.JELLY_BEAN) @Override public void onClick(View v) {if(alpha <= 0){ //透明度下限 alpha = 0 ;}else{ alpha -= 20 ;}imageView1.setImageAlpha(alpha); //為圖片設置透明度 }});//對切換圖片按鈕設置監聽事件next.setOnClickListener(new View.OnClickListener() { @Override public void onClick(View v) {//控制顯示下一張圖片imageView1.setImageResource(images[++ currentImage % images.length]); }}); }}
效果圖如下,點擊按鈕可以改變透明度和切換圖片

以上就是本文的全部內容,希望對大家的學習有所幫助,也希望大家多多支持好吧啦網。
相關文章:
1. Python獲取抖音關注列表封號賬號的實現代碼2. ajax請求添加自定義header參數代碼3. Python數據分析之pandas函數詳解4. 解決Python 進程池Pool中一些坑5. php測試程序運行速度和頁面執行速度的代碼6. 無線標記語言(WML)基礎之WMLScript 基礎第1/2頁7. 三個不常見的 HTML5 實用新特性簡介8. 使用.net core 自帶DI框架實現延遲加載功能9. php網絡安全中命令執行漏洞的產生及本質探究10. Warning: require(): open_basedir restriction in effect,目錄配置open_basedir報錯問題分析

 網公網安備
網公網安備