vue項(xiàng)目中使用bpmn-自定義platter的示例代碼
內(nèi)容概述
本系列“vue項(xiàng)目中使用bpmn-xxxx”分為七篇,均為自己使用過(guò)程中用到的實(shí)例,手工原創(chuàng),目前陸續(xù)更新中。主要包括vue項(xiàng)目中bpmn使用實(shí)例、應(yīng)用技巧、基本知識(shí)點(diǎn)總結(jié)和需要注意事項(xiàng),具有一定的參考價(jià)值,需要的朋友可以參考一下。如果轉(zhuǎn)載或通過(guò)爬蟲(chóng)直接爬的,格式特別丑,請(qǐng)來(lái)原創(chuàng)看:我是作者原文
前情提要
經(jīng)過(guò)前四篇的學(xué)習(xí),我們能夠?qū)崿F(xiàn)bpmn基本繪圖、預(yù)覽、為節(jié)點(diǎn)加事件加顏色等效果,這一篇我們來(lái)說(shuō),如何自定義左側(cè)工具欄(platter),首先看一下自定義前后效果圖對(duì)比:
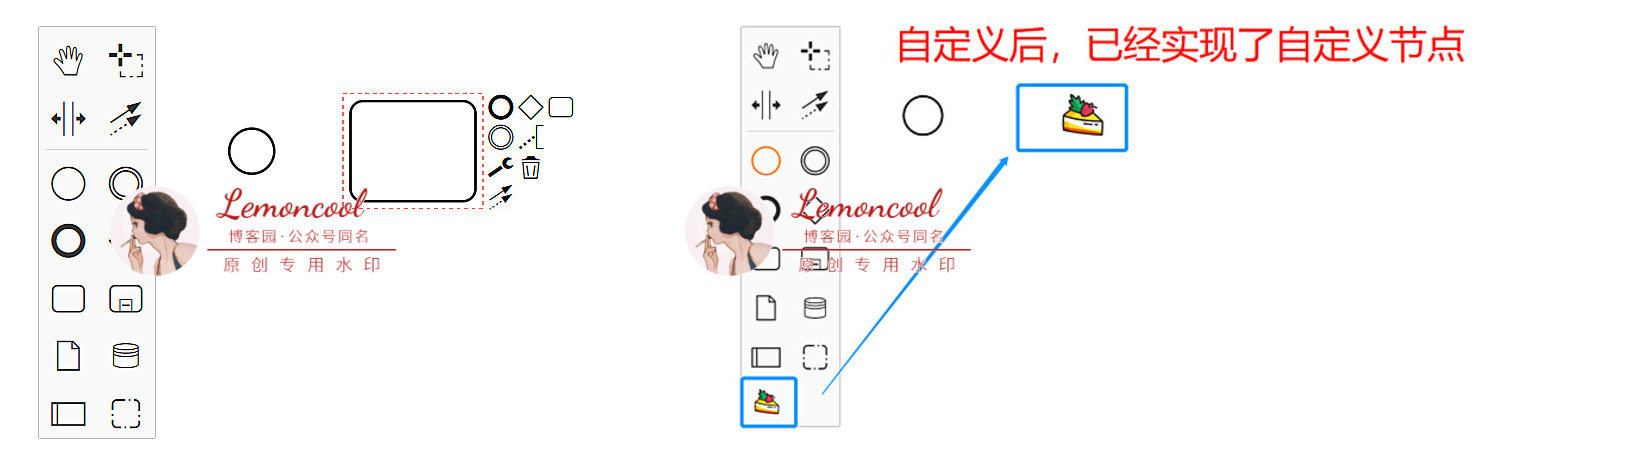
我們本次要實(shí)現(xiàn)的目標(biāo):基于左側(cè)platter原有元素類(lèi)型,創(chuàng)建出一個(gè)新的自定義節(jié)點(diǎn)。暫且叫它“草莓蛋糕”節(jié)點(diǎn),類(lèi)型是 bpmn:Task,樣式我們自己找一個(gè)好看的小草莓蛋糕圖案。所以,開(kāi)動(dòng)吧~首先新建一個(gè)“customPalette”文件夾,里面放我們今天所有自定義的文件。
步驟1:建立platter類(lèi)函數(shù),命名為CustomPalette.js
export default class CustomPalette { constructor(create, elementFactory, palette) { this.create = create; this.elementFactory = elementFactory; palette.registerProvider(this); } // 這個(gè)是繪制palette的核心,函數(shù)名不要變 getPaletteEntries() { const elementFactory = this.elementFactory; const create = this.create; function dragEventFactory(type) { return function (event) { const taskShape = elementFactory.create(’shape’, { type: type }); create.start(event, taskShape); }; } return { ’create.cake’: { title: ’我是自定義節(jié)點(diǎn)-草莓蛋糕’, // 鼠標(biāo)懸浮到節(jié)點(diǎn)上顯示的文字 className: ’icon-custom bpmn-icon-cake’, // 樣式名 action: { // 操作該節(jié)點(diǎn)時(shí)會(huì)觸發(fā)的事件,此時(shí)只注冊(cè)一個(gè)拖動(dòng)事件即可,否則拖動(dòng)時(shí)沒(méi)有效果 dragstart: dragEventFactory(’bpmn:Task’) } } }; }}CustomPalette.$inject = [ ’create’, ’elementFactory’, ’palette’];
此時(shí),我們已經(jīng)注冊(cè)好了一個(gè)名稱(chēng)為“create.cake”的節(jié)點(diǎn),拖動(dòng)它時(shí),畫(huà)布中會(huì)出現(xiàn)一個(gè)'bpmn:Task'類(lèi)型的節(jié)點(diǎn),此時(shí)需要將該文件導(dǎo)出并在頁(yè)面中引入,否則沒(méi)有效果。
步驟2:在CustomPalette.js同級(jí),建立一個(gè)index.js文件將其導(dǎo)出
import CustomPalette from ’./CustomPalette’;export default { __init__: [’customPalette’] customPalette: [’type’, CustomPalette],};
步驟3:頁(yè)面中(index.vue)引入index.js
import customModule from ’./customPalette’;export default { mounted() { this.containerEl = document.getElementById(’container’); this.bpmnModeler = new BpmnModeler({ additionalModules: [ customModule ] });}
步驟4:為節(jié)點(diǎn)定義樣式
新建一個(gè)customPalette.scss文件,在該文件同級(jí)放一張“cake.png”的圖片,作為節(jié)點(diǎn)的背景圖寫(xiě)入。背景圖引入的話,貌似只支持.png格式,親測(cè):jpg報(bào)錯(cuò)
.bpmn-icon-cake { background-image: url(’./cake.png’);} .icon-custom { background-size: 65%; background-repeat: no-repeat; background-position: center center;}
并且在main.js中引入,注意,一定要在main.js中全局引入,否則不生效。
import ’customPalette/customPalette.scss’;
此時(shí),我們便可以在左側(cè)工具欄中看到自定義的“草莓蛋糕”節(jié)點(diǎn)了,但是此時(shí)拖動(dòng)該節(jié)點(diǎn),右側(cè)只會(huì)產(chǎn)生一個(gè)“bpmn:Task”的節(jié)點(diǎn),只有一個(gè)框框。
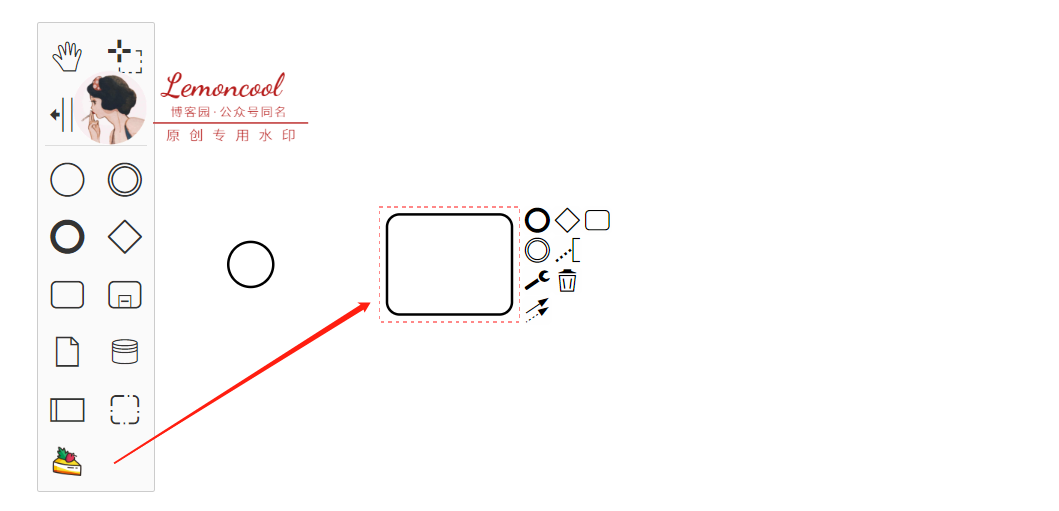
我們希望的是,拖動(dòng)后畫(huà)布中也顯示自定義圖標(biāo),所以我們進(jìn)行下一步:自定義渲染
步驟5:畫(huà)布渲染自定義節(jié)點(diǎn)
此時(shí)需要我們新建一個(gè) CustomRenderer.js文件,作用:自定義 renderer。因?yàn)槲覀兪窃赽pmn原有的元素“bpmn:Task”基礎(chǔ)上進(jìn)行修改,所以我們需要對(duì)將BaseRenderer進(jìn)行繼承。
import BaseRenderer from ’diagram-js/lib/draw/BaseRenderer’; // 引入默認(rèn)的renderer const HIGH_PRIORITY = 1500; // 最高優(yōu)先級(jí) export default class CustomRenderer extends BaseRenderer { // 繼承BaseRenderer constructor(eventBus, bpmnRenderer) { super(eventBus, HIGH_PRIORITY); this.bpmnRenderer = bpmnRenderer; } canRender(element) { return !element.labelTarget; } drawShape(parentNode, element) { const shape = this.bpmnRenderer.drawShape(parentNode, element); return shape; } getShapePath(shape) { return this.bpmnRenderer.getShapePath(shape); }} CustomRenderer.$inject = [’eventBus’, ’bpmnRenderer’];
此時(shí), CustomRenderer.js文件大概結(jié)構(gòu)完成了,注意:HIGH_PRIORITY變量和canRender不可以刪掉,否則會(huì)有問(wèn)題。重頭戲是里面的drawShape函數(shù)。
步驟6:書(shū)寫(xiě)drawShape函數(shù)
我們?cè)贑ustomRenderer.js同級(jí)建立一個(gè)util文件,記錄自定義類(lèi)型節(jié)點(diǎn)的一些屬性。
import cake from ’./cake.png’;// 自定義元素的類(lèi)型,此時(shí)我們只需要自定義一種節(jié)點(diǎn),所以數(shù)組只有一個(gè)元素const customElements = [’bpmn:Task’]; const customConfig = { // 自定義元素的配置 cake: { url: cake, attr: {x: 0, y: 0, width: 50, height: 50} }}; export {customElements, customConfig};
現(xiàn)在我們來(lái)書(shū)寫(xiě)drawShape函數(shù)
import { customElements, customConfig } from ’./util’;import { append as svgAppend, create as svgCreate } from ’tiny-svg’;...drawShape(parentNode, element) { const type = element.type; // 獲取到類(lèi)型 // 所有節(jié)點(diǎn)都會(huì)走這個(gè)函數(shù),所以此時(shí)只限制,需要自定義的才去自定義,否則仍顯示bpmn默認(rèn)圖標(biāo) if (customElements.includes(type)) { const {url, attr} = customConfig[’cake’]; const customIcon = svgCreate(’image’, {...attr, href: url}); element[’width’] = attr.width; element[’height’] = attr.height; svgAppend(parentNode, customIcon); return customIcon; } const shape = this.bpmnRenderer.drawShape(parentNode, element); return shape;}
步驟7: 導(dǎo)出并使用CustomRenderer
修改之前導(dǎo)出CustomPalette的index.js文件
import CustomPalette from ’./CustomPalette’;import CustomRenderer from ’./CustomRenderer’; export default { __init__: [’customPalette’, ’customRenderer’], customPalette: [’type’, CustomPalette], customRenderer: [’type’, CustomRenderer]};
注意:此時(shí)__init__內(nèi)的屬性名都不可以改,不要問(wèn)為什么,因?yàn)楦牧藞?bào)錯(cuò)。
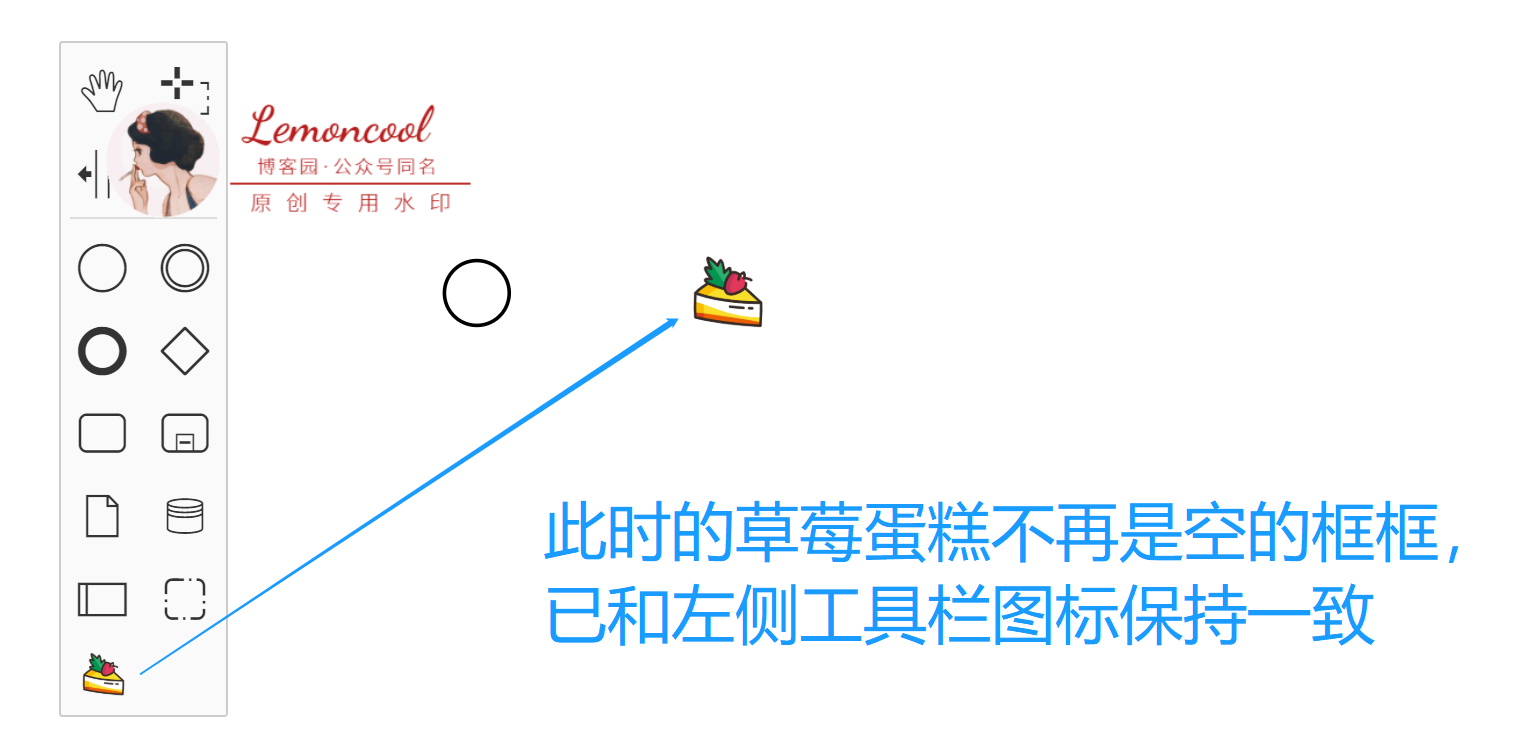
步驟3中已經(jīng)將該index.js引入到了頁(yè)面中,此時(shí)無(wú)需再次引入,此時(shí)我們來(lái)看看效果。
后續(xù)
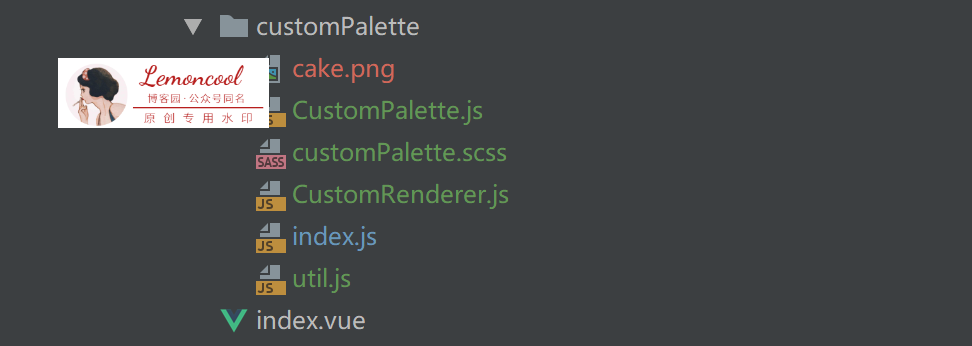
項(xiàng)目目錄:index.vue是畫(huà)布主頁(yè)面,同級(jí)customPalette文件夾下共有6個(gè)文件,結(jié)構(gòu)如下:
總結(jié)
到此這篇關(guān)于vue項(xiàng)目中使用bpmn-自定義platter的示例代碼的文章就介紹到這了,更多相關(guān)vue自定義platter內(nèi)容請(qǐng)搜索好吧啦網(wǎng)以前的文章或繼續(xù)瀏覽下面的相關(guān)文章希望大家以后多多支持好吧啦網(wǎng)!
相關(guān)文章:
1. 用xslt+css讓RSS顯示的跟網(wǎng)頁(yè)一樣漂亮2. ASP.NET Core自定義中間件的方式詳解3. 《CSS3實(shí)戰(zhàn)》筆記--漸變?cè)O(shè)計(jì)(一)4. HTML5 Canvas繪制圖形從入門(mén)到精通5. 讓chatgpt將html中的圖片轉(zhuǎn)為base64方法示例6. 詳解JSP 內(nèi)置對(duì)象request常見(jiàn)用法7. html5手機(jī)觸屏touch事件介紹8. CSS3實(shí)現(xiàn)動(dòng)態(tài)翻牌效果 仿百度貼吧3D翻牌一次動(dòng)畫(huà)特效9. 測(cè)試模式 - XSL教程 - 510. JSP的Cookie在登錄中的使用
 網(wǎng)公網(wǎng)安備