手把手教你SpringBoot快速集成Swagger的配置過程
相信大家無論是做前端還是做后端的,都被接口接口文檔所折磨過,前端抱怨接口文檔和后端給的不一致,后端抱怨寫接口文檔很麻煩,所以Swagger就誕生了。直接配置即可自動生成接口文檔,而且提供了高效的API測試話不多說直接開干導入SpringBoot集成Swagger所需要的依賴
<!--web方便測試--> <dependency> <groupId>org.springframework.boot</groupId> <artifactId>spring-boot-starter-web</artifactId> </dependency> <!-- swagger2核心包 --> <dependency> <groupId>io.springfox</groupId> <artifactId>springfox-swagger2</artifactId> <version>2.9.2</version> </dependency> <!-- swagger-ui 可視化界面 --> <dependency> <groupId>io.springfox</groupId> <artifactId>springfox-swagger-ui</artifactId> <version>2.9.2</version> </dependency>
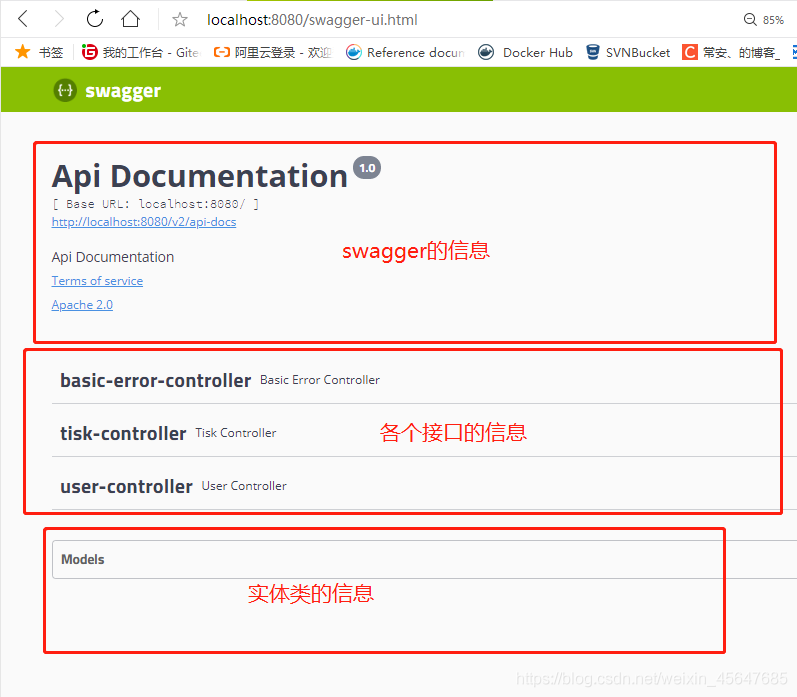
Swagger可視化界面可分為三個區域
Swagger相關配置
package com.example.config;import org.springframework.context.annotation.Bean;import org.springframework.context.annotation.Configuration;import springfox.documentation.builders.RequestHandlerSelectors;import springfox.documentation.service.ApiInfo;import springfox.documentation.service.Contact;import springfox.documentation.spi.DocumentationType;import springfox.documentation.spring.web.plugins.Docket;import springfox.documentation.swagger2.annotations.EnableSwagger2;import java.util.ArrayList;@Configuration@EnableSwagger2 //開啟Swagger的使用public class SwaggerConfig { @Bean //Swagger的使用主要是要將docket對象傳入IOC容器 public Docket docket(){ return new Docket(DocumentationType.SWAGGER_2).apiInfo(apiInfo()) //關于文檔的各種信息.enable(true) //使Swagger生效.groupName('常安祖').select()//選擇掃描的接口.apis(RequestHandlerSelectors.basePackage('com.example.controller'))//指定掃描的接口.build(); } public ApiInfo apiInfo(){ Contact contact = new Contact('長安','https://blog.csdn.net/weixin_45647685','719801748@qq.com');//個人的聯系方式 return new ApiInfo('長安的文檔', '長安的開發文檔', '1.0', 'urn:tos',null, 'Apache 2.0', 'http://www.apache.org/licenses/LICENSE-2.0', new ArrayList());//文檔的各種信息 }}
@ApiModel( ) //主要用來標注返回的實體類@ApiModelProperty( ) //主要用來標注實體類中的屬性案例:
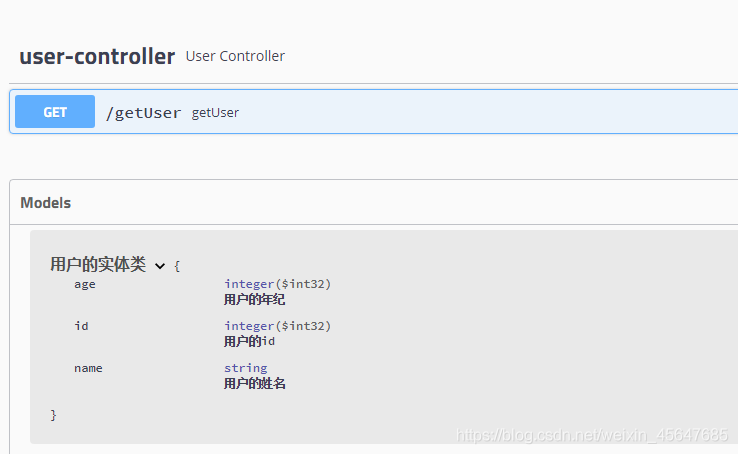
@ApiModel('用戶的實體類')public class User implements Serializable { @ApiModelProperty('用戶的id') private Integer id; @ApiModelProperty('用戶的姓名') private String name; @ApiModelProperty('用戶的年紀') private Integer age; public Integer getId() { return id; } public User(Integer id, String name, Integer age) { this.id = id; this.name = name; this.age = age; } public void setId(Integer id) { this.id = id; } public String getName() { return name; } public void setName(String name) { this.name = name; } public Integer getAge() { return age; } public void setAge(Integer age) { this.age = age; }}
@ApiModelProperty用來標注API接口案例:
package com.yangzihao.controller;import com.yangzihao.entity.User;import io.swagger.annotations.ApiModelProperty;import org.springframework.stereotype.Controller;import org.springframework.web.bind.annotation.GetMapping;import org.springframework.web.bind.annotation.RequestMapping;@RestControllerpublic class UserController { @ApiModelProperty('得到一個User') @GetMapping('/getUser') public User getUser(){ return new User(1,'測試',18); }}
進入Swagger可視化界面
使用Swagger進行接口測試

執行

到此這篇關于手把手教你SpringBoot快速集成Swagger的配置過程的文章就介紹到這了,更多相關SpringBoot集成Swagger內容請搜索好吧啦網以前的文章或繼續瀏覽下面的相關文章希望大家以后多多支持好吧啦網!
相關文章:

 網公網安備
網公網安備