手把手帶你入門 Spring Security的具體流程
Spring Security 是 Spring 家族中的一個安全管理框架,實(shí)際上,在 Spring Boot 出現(xiàn)之前,Spring Security 就已經(jīng)發(fā)展了多年了,但是使用的并不多,安全管理這個領(lǐng)域,一直是 Shiro 的天下。
相對于 Shiro,在 SSM/SSH 中整合 Spring Security 都是比較麻煩的操作,所以,Spring Security 雖然功能比 Shiro 強(qiáng)大,但是使用反而沒有 Shiro 多(Shiro 雖然功能沒有 Spring Security 多,但是對于大部分項(xiàng)目而言,Shiro 也夠用了)。
自從有了 Spring Boot 之后,Spring Boot 對于 Spring Security 提供了 自動化配置方案,可以零配置使用 Spring Security。
因此,一般來說,常見的安全管理技術(shù)棧的組合是這樣的:
SSM + Shiro Spring Boot/Spring Cloud + Spring Security注意,這只是一個推薦的組合而已,如果單純從技術(shù)上來說,無論怎么組合,都是可以運(yùn)行的。
我們來看下具體使用。
1.項(xiàng)目創(chuàng)建
在 Spring Boot 中使用 Spring Security 非常容易,引入依賴即可:
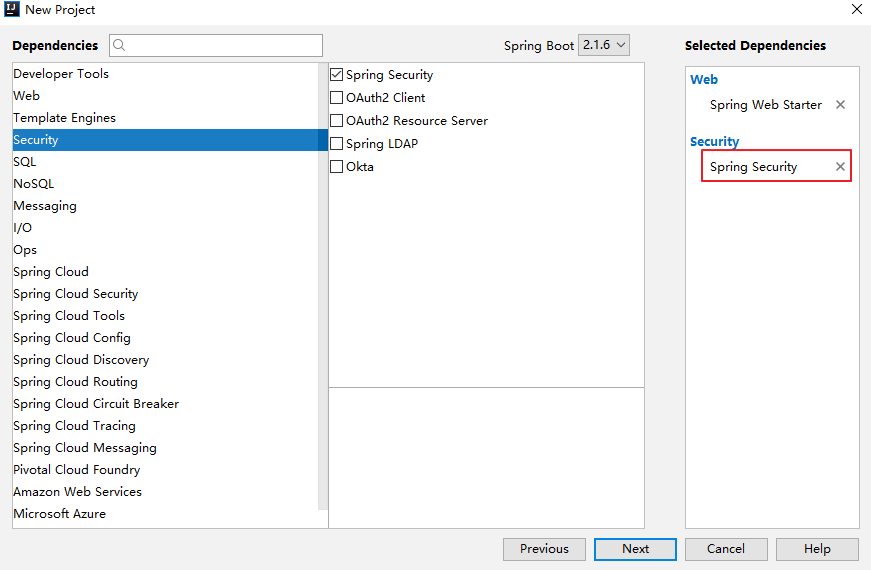
pom.xml 中的 Spring Security 依賴:
<dependency> <groupId>org.springframework.boot</groupId> <artifactId>spring-boot-starter-security</artifactId></dependency>
只要加入依賴,項(xiàng)目的所有接口都會被自動保護(hù)起來。
2.初次體驗(yàn)
我們創(chuàng)建一個 HelloController:
@RestControllerpublic class HelloController { @GetMapping('/hello') public String hello() { return 'hello'; }}
訪問 /hello ,需要登錄之后才能訪問。
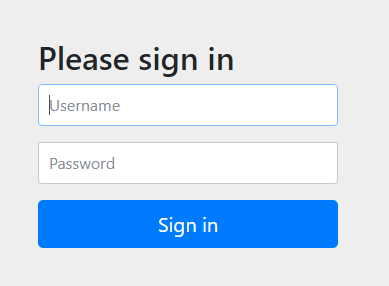
當(dāng)用戶從瀏覽器發(fā)送請求訪問 /hello 接口時,服務(wù)端會返回 302 響應(yīng)碼,讓客戶端重定向到 /login 頁面,用戶在 /login 頁面登錄,登陸成功之后,就會自動跳轉(zhuǎn)到 /hello 接口。
另外,也可以使用 POSTMAN 來發(fā)送請求,使用 POSTMAN 發(fā)送請求時,可以將用戶信息放在請求頭中(這樣可以避免重定向到登錄頁面):
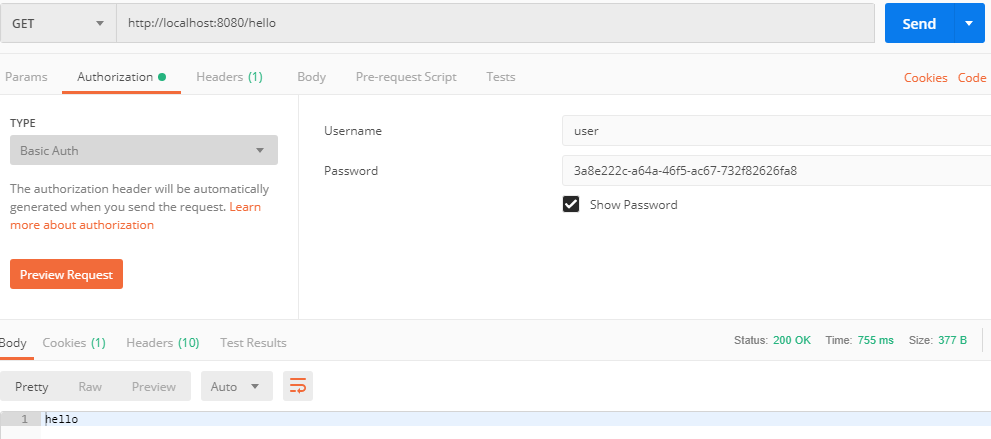
通過以上兩種不同的登錄方式,可以看出,Spring Security 支持兩種不同的認(rèn)證方式:
可以通過 form 表單來認(rèn)證 可以通過 HttpBasic 來認(rèn)證3.用戶名配置
默認(rèn)情況下,登錄的用戶名是 user ,密碼則是項(xiàng)目啟動時隨機(jī)生成的字符串,可以從啟動的控制臺日志中看到默認(rèn)密碼:
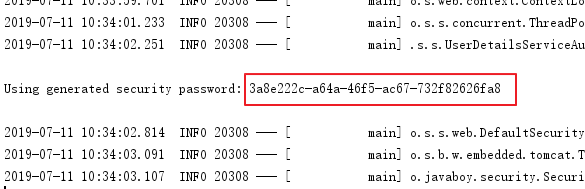
這個隨機(jī)生成的密碼,每次啟動時都會變。對登錄的用戶名/密碼進(jìn)行配置,有三種不同的方式:
在 application.properties 中進(jìn)行配置 通過 Java 代碼配置在內(nèi)存中 通過 Java 從數(shù)據(jù)庫中加載前兩種比較簡單,第三種代碼量略大,本文就先來看看前兩種,第三種后面再單獨(dú)寫文章介紹,也可以參考我的微人事項(xiàng)目。
3.1 配置文件配置用戶名/密碼
可以直接在 application.properties 文件中配置用戶的基本信息:
spring.security.user.name=javaboyspring.security.user.password=123
配置完成后,重啟項(xiàng)目,就可以使用這里配置的用戶名/密碼登錄了。
3.2 Java 配置用戶名/密碼
也可以在 Java 代碼中配置用戶名密碼,首先需要我們創(chuàng)建一個 Spring Security 的配置類,集成自 WebSecurityConfigurerAdapter 類,如下:
@Configurationpublic class SecurityConfig extends WebSecurityConfigurerAdapter { @Override protected void configure(AuthenticationManagerBuilder auth) throws Exception { //下面這兩行配置表示在內(nèi)存中配置了兩個用戶 auth.inMemoryAuthentication() .withUser('javaboy').roles('admin').password('$2a$10$OR3VSksVAmCzc.7WeaRPR.t0wyCsIj24k0Bne8iKWV1o.V9wsP8Xe') .and() .withUser('lisi').roles('user').password('$2a$10$p1H8iWa8I4.CA.7Z8bwLjes91ZpY.rYREGHQEInNtAp4NzL6PLKxi'); } @Bean PasswordEncoder passwordEncoder() { return new BCryptPasswordEncoder(); }}
這里我們在 configure 方法中配置了兩個用戶,用戶的密碼都是加密之后的字符串(明文是 123),從 Spring5 開始,強(qiáng)制要求密碼要加密,如果非不想加密,可以使用一個過期的 PasswordEncoder 的實(shí)例 NoOpPasswordEncoder,但是不建議這么做,畢竟不安全。
Spring Security 中提供了 BCryptPasswordEncoder 密碼編碼工具,可以非常方便的實(shí)現(xiàn)密碼的加密加鹽,相同明文加密出來的結(jié)果總是不同,這樣就不需要用戶去額外保存鹽的字段了,這一點(diǎn)比 Shiro 要方便很多。
4.登錄配置
對于登錄接口,登錄成功后的響應(yīng),登錄失敗后的響應(yīng),我們都可以在 WebSecurityConfigurerAdapter 的實(shí)現(xiàn)類中進(jìn)行配置。例如下面這樣:
@Configurationpublic class SecurityConfig extends WebSecurityConfigurerAdapter { @Autowired VerifyCodeFilter verifyCodeFilter; @Override protected void configure(HttpSecurity http) throws Exception { http.addFilterBefore(verifyCodeFilter, UsernamePasswordAuthenticationFilter.class); http .authorizeRequests()//開啟登錄配置 .antMatchers('/hello').hasRole('admin')//表示訪問 /hello 這個接口,需要具備 admin 這個角色 .anyRequest().authenticated()//表示剩余的其他接口,登錄之后就能訪問 .and() .formLogin() //定義登錄頁面,未登錄時,訪問一個需要登錄之后才能訪問的接口,會自動跳轉(zhuǎn)到該頁面 .loginPage('/login_p') //登錄處理接口 .loginProcessingUrl('/doLogin') //定義登錄時,用戶名的 key,默認(rèn)為 username .usernameParameter('uname') //定義登錄時,用戶密碼的 key,默認(rèn)為 password .passwordParameter('passwd') //登錄成功的處理器 .successHandler(new AuthenticationSuccessHandler() { @Override public void onAuthenticationSuccess(HttpServletRequest req, HttpServletResponse resp, Authentication authentication) throws IOException, ServletException { resp.setContentType('application/json;charset=utf-8'); PrintWriter out = resp.getWriter(); out.write('success'); out.flush(); } }) .failureHandler(new AuthenticationFailureHandler() { @Override public void onAuthenticationFailure(HttpServletRequest req, HttpServletResponse resp, AuthenticationException exception) throws IOException, ServletException { resp.setContentType('application/json;charset=utf-8'); PrintWriter out = resp.getWriter(); out.write('fail'); out.flush(); } }) .permitAll()//和表單登錄相關(guān)的接口統(tǒng)統(tǒng)都直接通過 .and() .logout() .logoutUrl('/logout') .logoutSuccessHandler(new LogoutSuccessHandler() { @Override public void onLogoutSuccess(HttpServletRequest req, HttpServletResponse resp, Authentication authentication) throws IOException, ServletException { resp.setContentType('application/json;charset=utf-8'); PrintWriter out = resp.getWriter(); out.write('logout success'); out.flush(); } }) .permitAll() .and() .httpBasic() .and() .csrf().disable(); }}
我們可以在 successHandler 方法中,配置登錄成功的回調(diào),如果是前后端分離開發(fā)的話,登錄成功后返回 JSON 即可,同理,failureHandler 方法中配置登錄失敗的回調(diào),logoutSuccessHandler 中則配置注銷成功的回調(diào)。
5.忽略攔截
如果某一個請求地址不需要攔截的話,有兩種方式實(shí)現(xiàn):
設(shè)置該地址匿名訪問 直接過濾掉該地址,即該地址不走 Spring Security 過濾器鏈推薦使用第二種方案,配置如下:
@Configurationpublic class SecurityConfig extends WebSecurityConfigurerAdapter { @Override public void configure(WebSecurity web) throws Exception { web.ignoring().antMatchers('/vercode'); }}
Spring Security 另外一個強(qiáng)大之處就是它可以結(jié)合 OAuth2 ,玩出更多的花樣出來,這些我們在后面的文章中再和大家細(xì)細(xì)介紹。
到此這篇關(guān)于手把手帶你入門 Spring Security的文章就介紹到這了,更多相關(guān)入門 Spring Security內(nèi)容請搜索好吧啦網(wǎng)以前的文章或繼續(xù)瀏覽下面的相關(guān)文章希望大家以后多多支持好吧啦網(wǎng)!
相關(guān)文章:
1. Ajax實(shí)現(xiàn)表格中信息不刷新頁面進(jìn)行更新數(shù)據(jù)2. 詳解CSS偽元素的妙用單標(biāo)簽之美3. pip已經(jīng)安裝好第三方庫但pycharm中import時還是標(biāo)紅的解決方案4. 使用Python FastAPI構(gòu)建Web服務(wù)的實(shí)現(xiàn)5. UDDI FAQs6. msxml3.dll 錯誤 800c0019 系統(tǒng)錯誤:-2146697191解決方法7. HTML <!DOCTYPE> 標(biāo)簽8. Python collections模塊的使用方法9. CSS自定義滾動條樣式案例詳解10. 將properties文件的配置設(shè)置為整個Web應(yīng)用的全局變量實(shí)現(xiàn)方法
 網(wǎng)公網(wǎng)安備